Flooring Installation: Covering the Process, Type of Flooring, Price, and Much More!
August 18, 2023
After getting your flooring material, installation is the next and most crucial step. No matter how good your flooring type is, it can cause many issues if installed wrongly.
To ensure you’ve got everything down to a T, we’ve included everything you need to know about flooring installation, including the process for each type of flooring and how much you may spend on installation.
Down the line, you’ll learn how to maintain and clean your new flooring to make it last longer and how you can dispose of old floors. We’re in for a long ride, so sit tight!
What Is the Process for Fitting Flooring?
There’s no one-size-fits-all process for fitting flooring; it all boils down to what flooring you’re installing. Still, there are general steps you can follow for flooring installation, and some of them are outlined below:
Select the Right Kind of Flooring: There are different flooring materials out there, including hardwood, laminate, tile, and vinyl. So, choose the best option based on the installation area, your lifestyle, and your budget.
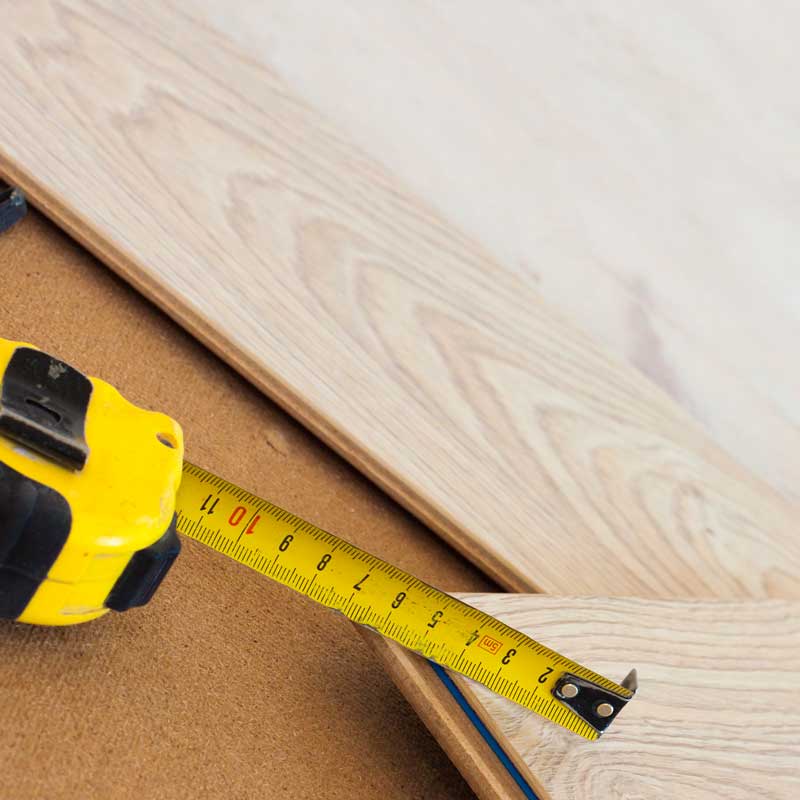
Measure the Rooms: The next step would be to measure the rooms you plan to fit new flooring. This will ensure that you get enough materials for the installation. Try to get more materials than you need in case you make a mistake with the measurement.
Get the Right Tools: Having all the tools you need before working is essential to avoid stopping in the middle of the project to get a missing item. Some include saws, screwdrivers, a hammer, a broom, etc. You can find some of these tools at home, but you can always buy or borrow them if you don’t have them.
Inspect Your Subfloor: The subfloor is an essential aspect of the installation process, so you must pay attention to it. Knowing the kind of subfloor you’re working with will help you determine the correct type of flooring to install. You may need an underlayment before fitting the flooring.
Read the Instructions: After getting your flooring material, go through the instructions before you start fitting. This will make your work easier and save you a lot of trouble. You can also get help on YouTube and other social media platforms.
Acclimate the Material: It’s better to get the material some days before installation, lay it out in your home, and leave it to adjust to the house’s humidity level. This way, you won’t have to deal with a shifted or warped material after fitting it.
Lay Out the Material: Before fitting your flooring, lay out the material in your desired pattern. This will give you a clearer picture of the process and help you to plan. You’ll also be able to identify other things you need before installing.
How Do You Get Ready to Install a New Floor?
No matter what type of flooring you choose, here are some steps you need to take to get your house ready for installation:
Get Rid of Breakables: One of the first things you must do is to take out every item in the room that could break. Some of these breakables may include ceramic bowls, mirrors, artwork, or lighting fixtures with glass. Look around and confirm that you haven’t left anything out.
Remove Furniture: To make the installation process faster, it’s advised that you clear the room of all furniture some days before work starts. Ensure the furniture is well covered to prevent dust from settling on its surface.
Disconnect Electronics and Gas Appliances: It’s also important to disconnect any electrical outlets and gas hookups in the installation area. You can do this yourself, but if you aren’t confident, contact a professional to help you disconnect them.
Confirm New Floor Height: Sometimes, new flooring can cause a change in height to the floor, which means you may need to adjust the doors. If you don’t, the new flooring may disturb the smooth opening and closing of the door.
Remove Doors, Door Trims, and Baseboards: Ensure you remove all these fixtures to make the work easier for installers. Plus, storing all these items away will ensure nothing goes wrong with the fitting process.
Create a Designated Cutting Area: If you don’t want to deal with scattered scraps of debris or sawdust, it’s better to create a designated cutting area, like your garage. This way, you can easily sweep away trash after work.
Secure Pets: Having pets around during installation can disrupt the workflow, as these animals can get in the way. Plus, the sound of a buzzsaw can frighten them, and let’s not forget that dust and debris can harm these critters. Therefore, you should keep your pets away from the work area.
Should You Install Underlay?
Yes, you should install an underlay, although it depends on the kind of flooring you’re installing. Generally, underlay helps with sound absorption, evens out unstable subfloors, and increases the lifespan of your flooring.
How Do You Install Different Types of Flooring?
Although there’s a general process for fitting any flooring type, each one has its unique installation process. Here, we’ll look at some popular flooring materials and how you can install them.
Wood Flooring Installation
Wood planks or strips are usually nailed to the subfloor. Here are the steps you should follow to install hardwood flooring:
Locate Joists: Drive a nail partly into the floor as a joist locator near one end of the longest wall. With a measuring tape, find other beams and mark each with a protruding nail.
Cut Casing: The casing should be cut so planks or strips can be neatly inserted beneath it. Stack a piece of wood against the casing and place the backsaw on top.
Apply Underlayment: Before laying planks, install the underlayment on the subfloor, allowing its length to run perpendicular to the joists.
Mark Joists: Use a chalk line to create a line across the nails locating the joists. This line will serve as a guide during proper installation.
Drill Pilot Holes: Predrill 1/16-inch pilot holes through the board face to stop nails from ruining the board once you start nailing.
Lay First Boards: Lay first boards along the chalk line, with the grooves facing the wall. Use ¾-inch spacers between the end of the panels and the wall to create an allowance for wood expansion. Secure the first board with a pneumatic face nailer or hammer, and follow the same process to lay subsequent boards.
Finish the First Row: While installing the first row, you should countersink nails, i.e., drive them slightly into the ground to avoid interference in the joint. Then, leave another ¾-inch between the wall and the final board to allow for expansion.
Lay Next Row: For the next row, offset the end joints by at least 6 inches from the previous row. Make the boards tightly snug, from row to row and end to end. Don’t forget to create pilot holes and insert nails through the tongues.
Use a Nailer: After installing the third row, use a side nailer to drive nails through the tongue. Don’t forget to tap boards into place using a mallet.
Continue Laying Rows: Work your way across the room, laying planks row by row and driving nails about 1/16 inch. Pay attention to obstacles and corners, and install planks accordingly.
Lay the Last Row: For the final row, lay all the planks or strips before nailing them into place. You may be unable to use a side nailer here, so you must drill pilot holes and face nail. Use a pry bar to pull the boards together to make them fit tightly.
Close Gaps: You can conceal the gap between the wall and the last row with shoe moulding and baseboard. Conceal nail holes with matching wood putty.
Laminate Flooring Installation
Laminate flooring is one of the easiest flooring materials to install, and you can get it done by following these steps:
Install the First Row: Begin by laying the first row, allowing the tongue side to face the starting wall, with about ¼ to ⅜ inch space in-between. This position will serve as a template for whatever design you have in mind. It’s better to start on the right side and work your way to the left.
Cut Off the Tongue: Once you’re satisfied with the layout, you should cut off the tongue of all the long planks. You should do the same for the short side of your first piece, as it’ll be installed in the corner against the spacers.
Add the Second Row: Before locking the first row, lay out the second row with the tongue facing the wall again. To avoid H joints, ensure the boards are offset by at least 6 inches. Then you can cut the boards to the desired length.
Install Rows Simultaneously: Use an alternating pattern to install the planks, installing two rows simultaneously.
Click the Planks: Most laminate floors use a click-lock system, so all you have to do is insert the groove into the tongue and rotate until it locks into place. Continue the process for the next series of planks.
Tap the Sides: After clicking the planks into place, use a hammer and tapping block to gently tap along the long and short sides to lock them into place and close the joints.
Cut Extra Pieces: To make the last row fit, you may need to cut extra pieces. Take the desired width, subtract the expansion gap, and then cut along the length of the plank.
Install the Final Row: Install the tongue into the long side and align the short side. Then, with a hammer and pull bar, lock the final row into place and gently tap the short side closed.
Vinyl Flooring Installation
This is how you can install vinyl flooring:
Cut and Lay the First Row of Planks: With a utility knife, trim the tongue of the first row of vinyl planks. Place the first plank on the starting line with the exposed side facing the wall. Ensure you maintain the expansion gap.
Lay Planks: Put the next plank over the previous one by holding it at an angle and folding it down to secure it. Use a utility knife to score the last piece and snap it into place.
Stagger the Joints: To allow for a more natural appearance, stagger the joints of the vinyl planks at least 6 inches.
Insert the Tongue: Insert the tongue of the next row into the groove of the previous one and rotate down until it locks into place. Continue the process, alternating between long and short pieces. For peel-and-stick vinyl planks, simply peel back the adhesive casing and stick the plank to the subfloor.
Install Baseboards: After laying the planks, install baseboards along the wall.
Carpet Installation
Once the installation area is well-prepped, you can follow these steps for DIY carpet installation:
Remove Old Carpet: If there’s an old carpet in the room, remove it alongside its padding. Clean the subfloor and correct any issues. Also, remove residual paint, staples, or glue, and vacuum the floor.
Fix Tackless Strips: Cut tack strips and nail them to the floor, placing them about ½ inch away from the wall. Ensure the tack points face the wall and the strips are fixed end-to-end.
Fix Carpet Padding: Carpet padding adds insulation to the room and helps to reduce noise. After determining the direction your new carpet will face, unroll the carpet pad and make it perpendicular to the carpet’s direction. Staple it down near the tackless strips with a staple hammer. Don’t staple pad seams next to each other.
Measure and Trim the Carpet: Measure the most extended area of the room and add 3 inches to this measurement. Afterwards, move the carpet to a large exterior space, mark the size on the back of the carpet, and trim off the excess corners.
Apply Glue: Place a seaming tape beneath the carpet’s seam, allowing the sticky side to face up. Place a heated seaming iron on the tape for a few seconds to let the soft glue stick to the carpet seams. Then, put something heavy on the seam to hold the sections together while the glue dries.
Install the Carpet: At one side of the room, place the edge of the carpet along the strips and use a knee kicker to hit the padded side. This will spread the carpet across the strips, and you can trim the excess carpet. Continue using the knee kicker to lay the carpet across the strips until you’ve covered the entire room.
What Tools Do You Need to Install Flooring?
The right tools and equipment are vital to how well the flooring installation turns out. Plus, it’ll make your work faster and reduce the chances of mistakes.
These are some essential tools you need to get the ball rolling:
Protective gear like safety goggles, knee pads, dust mask, heavy gloves, etc.
Tape measure
Levelling tools
Chalk line
Different kinds of saws
Hammer
Screwdriver
Trowel
Why Is It Important to Have the Right Tools for Floor Fitting?
Having the right tools for floor fitting is essential if you want to have a trouble-free and painless installation process. It can be a hassle to stop working halfway because you don’t have the necessary tools for the next step.
What Are the Vital Tools Required for Flooring Installation?
Some tools are a must-have in every flooring installation, no matter the kind of material you’re fitting. These vital tools include a tape measure, levelling tools, saws, pencils, knee pads, gloves, hammers, underlayments, tapping blocks, etc.
Does the Installation of Flooring Involve any Special Tools?
Generally, the average flooring installation cost is £400-£1000, although this is based on several factors, like the flooring material, its brand, the size of the room(s), and even your location.
What Factors Are Taken Into Account When Determining the Price of Flooring Installation?
The factors determining the price of flooring installation include the following:
Kind of installation work you need (whether it’s renovating old floor surfaces or a total revamp of your living space)
Type of house you’re living in
Sub-floor type
Size of the installation area
Flooring material and style
Labour costs
Unplanned expenses like buying extra materials.
How Do the Different Kinds of Flooring Affect the Cost of Installation?
As you know, there are several flooring materials to choose from, each of which differs in cost per square metre range. Factors like the material’s source or brand, quality, special transformation, and others can affect the installation cost.
On top of that, some materials are naturally more expensive than others. For example, hardwood is more expensive than laminate, so you should expect the installation cost of the former to be higher.
How Does the Size of the Ground Area Affect the Cost of Installation?
It’s common for installation companies to indicate the cost per square metre. This means that a larger room will cost more than a smaller room. Note that the price range per square metre is usually determined by the kind of material you’re installing.
Are There Any Extra Costs Associated With Floor Fitting?
Yes, there are extra costs associated with floor fitting. This is because there’s more to floor installation than simply laying out the material, and each of these activities affects the overall floor fitting cost.
Other costs you should consider when fitting new flooring include:
Screeding cost
Underfloor heating cost
New skirting board costs
New underlay costs
Do You Need to Get Rid of the Old Flooring Before Installing the New Flooring?
Yes, if there are existing issues with the old flooring, like worn or broken parts, or you need to repair the subfloor, then you must remove the old flooring altogether before installing the new one. Otherwise, you could leave it.
However, you should also consider the floor height if you want to retain the old flooring. Some houses aren’t designed for thick floor covering; confirm that your floor can accommodate extra layers before deciding.
How Do You Figure Out How Much Flooring to Buy for Installation?
To determine how much flooring to buy for installation, you need to consider a few things like room size and other obstacles like doors and closets.
How Do You Get an Exact Measurement of the Room’s Size For Installation?
To get the exact measurement of the room’s size, use a tape measure to record the length and width of the room, then multiply these figures to get the size of the room.
If the room isn’t perfectly rectangular or square, we recommend splitting the space into multiple rectangular sections. Get the length and width of each section to find the area. Then, you can add the area of individual rectangles to get the total size of the room.
When Figuring Out How Much Flooring to Buy, How Do You Account for Doors, Closets, and Other Obstacles?
Doors, closets, and other obstacles are permanent objects where you can’t install flooring. The best way to get an estimate of how much flooring to buy would be to subtract the total area of the obstructed spaces from the gross area of the room.
What Are the Different Ways of Determining How Much Flooring Is Needed?
To know just how much flooring you need, you can do the following:
Get a rough estimate by measuring the area of the room
Consider permanent objects and obstructions in the space, and subtract their measurements from the total area
Calculate the area of all the rooms involved and add them together
Consider the waste factor for your project and add that to the total estimate
How Much Extra Flooring Should Be Bought So It Can Be Cut and Put in Place?
Almost every installation requires cuts to ensure that the material fits perfectly during fitting. Therefore, try adding 10% more flooring to the overall estimate for rectangular rooms, 5%-7% more for square rooms, and about 15% more for rooms with multiple or complicated angles.
How Long Does It Usually Take to Lay Down New Flooring?
Usually, a two-person crew can install 200-300 square metres of flooring daily. Therefore, depending on the room size, it should take an average of two to three days to complete an installation project. Note that this is subject to several factors, such as the type of flooring.
The Length of the Flooring Installation Process Can Be Affected By What Factors?
Some of the factors that can affect the length of the flooring installation include:
The size of the room
Flooring material
The number of people carrying out the job
The amount of prep work needed before the actual installation starts
Can You Install Flooring on Your Own, or Should You Hire a Pro?
Yes, you can install flooring on your own, as several manufacturers now produce factory-finished floors that can be installed in a few steps. However, you should hire a pro if you don’t feel up for it.
In addition, some flooring types, like concrete, can’t be handled as a DIY project. These kinds of floorings require the expertise of a professional.
What Are the Pros of Installing Your Own Flooring?
These are some of the advantages of installing your flooring:
It’s more cost-effective than hiring a professional
You can install your flooring however you want it
It’s easy to get the job done at your convenience
Why Is It a Good Idea to Have a Professional Install Your Flooring?
As great as DIY installation is, sometimes it’s better to hire a professional for the following reasons:
Experts can give you more information on the right flooring for your budget and need
A professional will always install flooring properly, so you don’t have to worry about an improper installation
How Do You Maintain Your New Floors?
Although each flooring material has its unique maintenance tips, there are general guidelines you can still follow to maintain new floors. Here are a few of them:
Place Mats at the Entrance: This will encourage everyone to clean their feet before coming into your house and reduce the accumulation of debris, dirt, and grime
Avoid Spills: Spills can cause accidents and ruin some flooring materials, so carefully handle liquid around the house. If there’s an accidental spill, clean it up immediately
Clean Regularly: Dust or sweep floor surfaces regularly to get rid of dust and dirt and to maintain the beauty of your flooring
Treat High-Traffic Areas With Extra Care: You should clean and vacuum high-traffic areas twice as much as other areas in the house
Don’t Clean With Harsh Chemicals: Harsh chemicals like bleach or ammonia can ruin new floors. Instead, use product-specific cleaning solutions
Handle Furniture Carefully: Don’t drag your furniture across the floor—lift them. You can also use furniture pads to avoid dents and scratches on the floor
How Do You Clean Your Brand-New Flooring?
There are different cleaning methods you can apply based on the flooring material. However, these are some general tips that can work for most flooring types:
Sweep or Vacuum: You should do this to get rid of dust, debris, or grime
Damp Mop: Use mild cleaning agents and mop to clean your flooring regularly
How Often Do You Need to Clean Your New Flooring?
Carpets and rugs are prone to dirt accumulation, so you should vacuum them at least twice a week, or more, especially in high-traffic areas. Note that you’ll need to clean even more often than that if you own pets.
Similarly, you should wet-mop high-traffic areas at least once a week, and less frequently used rooms can be mopped every other week.
How Should You Clean up Messes and Spots on Your Flooring to Keep Them From Becoming Permanent?
Water is usually enough to remove stains and spots on your flooring, but you may need to rub the area with a soft cloth or mop and cleaning agent for difficult stains. You can also use other agents, like vinegar, to clean up spots.
How Should You Clean Your Flooring to Get Rid of Dirt, Trash, and Pet Hair?
To remove dirt, debris, and pet hair from flooring, you’ll need a rubber broom and dustpan for most kinds of flooring. A microfibre dust mop is also quite handy, as the static electricity from this tool can attract dirt particles and pet hair. And finally, you can never go wrong with a vacuum.
How Do You Dispose of Old Floors?
Since every flooring material is unique, their disposal methods may vary. Therefore, knowing the flooring type you’re tossing is best before choosing the appropriate disposal method. Still, some materials can be disposed of in similar ways.
Are There Any Regulations or Guidelines in Your Local Area Regarding the Disposal of Old Flooring?
Several local areas have regulations or guidelines concerning waste disposal, including old flooring. These regulations may vary based on location, so you should confirm these laws in your local area before disposing of flooring material.
What Are Some Ways to Get Rid of Old Flooring That Are Good for the Environment?
If you’re getting rid of old flooring, you must do it correctly. Here are some disposal methods you can use:
Use a local recycler, especially for flooring materials like laminate, linoleum, and vinyl
Donate the materials
Upcycle or repurpose it
Use a junk removal service
Rent a dumpster
Are There Recycling Sites or Other Places Nearby That Take Old Flooring?
Yes, recycling sites take old flooring, especially linoleum, vinyl, and laminate flooring. You can always do your research to find the one closest to you.
Will the People Who Install Your Flooring Take Care of Getting Rid of Your Old Flooring?
It depends on the installer. Some will remove the old floor and help you get rid of them, although this usually attracts extra cost. You should confirm how much the installer will charge for getting rid of old flooring to avoid being blindsided by the additional fee.
Some installers won’t handle these things for you; in this case, you’ll have to do it yourself or find someone who will.
To Wrap Up
As we’ve mentioned in the beginning, the wrong installation can cause many issues that can be avoided. And with the correct information on how to fit your flooring properly, you should be able to buy and install your floors in a breeze. Everything you need to know about flooring installation has been outlined here, so you’re good to go.
However, if you need more insight into the installation process, you can contact us to put you through.
Explore Our Diverse Blog Content
Browse through our blog articles covering a wide range of flooring subjects. From home improvement to interior design, our content provides valuable information and inspiration for your interests and needs.