


(0)1622 589 999

info@allfloorstradecenter.co.uk


Regardless of it's quality, wood flooring is prone to damage. And hiring a refinisher every time you find a scratch, gouge, dent, gap or else isn’t very practical, but what if we taught you how to fix wood floor surfaces? Whether you’re a homeowner, landlord, real estate investor or property developer, you can handle these imperfections yourself.
Yes, some refinishing can go a long way in repairing your wood floor. So, try out some easy fixes before calling a professional.
How to repair wood floor surfaces relies on the floor type, which applies to other home projects as well, such as installing underfloor heating.
Also, when you have wood floors, the type of finish, whether that’s a wax coating, aluminium oxide coating or others, helps you decide the appropriate refinishing method. For instance, if you have a wood floor with a varnished or shellac finish, paste, liquid wax or oil can give it a desirable lustre.
As for the method, zone in on the damaged area, and thoroughly (but gently) clean it because cleaning and maintenance is always the first step in how to fix wood floor. Remove all dust, hair and grime, and if the trouble spot has dirt that you can clean, do so as well.
Also, you can use a vacuum or a soft mop, but don’t use brooms or abrasive scrub pads. And soaking the floor with liquid cleaners or water is a no-no. Instead, 2 to 4 drops of liquid soap in a quart of water should do; mix them in a spray bottle, and mist your floor.
Then, mop it with a microfiber mop, and lightly spray it with fresh water. Finally, use a soft, dry cloth to buff the floor.
Tip: wax remover solutions can be excellent in cleaning off any wax before reparation.

If you’ve dragged hefty furniture pieces over your floor without protecting it, they may have left gouges over its surface. And its fibres are likely frayed or broken.
But before we get into how to fix gouge in wood floor surfaces, you have to get a wooden filler from your local wood flooring store. And choose one that matches your flooring’s colour so that the repaired area blends with the rest of the floor.
Then, insert the filler in the gouge, and give it sufficient time to dry. Afterwards, gently sand over the filled area to provide it with an even and uniform look.
However, if you have small, surface-level gouges, you can fix them with the easiest DIY hack. All you have to do is use a brown crayon to fill in the gouge and wipe off any extra wax.
As for dents, the method used varies according to the finishing. In other words, finished and prefinished wood have their specific treatments.
Firstly, you can treat slight dents in prefinished wood floors using moisture and heat. Place a damp towel on the damaged spot. Then, put a steamer over it. You’ll start to notice the floor rising slowly. So, carry on dabbing the wood with the hot steamer until you restore it to its former shape. This process shouldn’t take more than 5 minutes.
Tip: If the dents are extremely deep and huge, replacing your damaged floorboards with matching ones may be your only option.
Secondly, you’ll be relieved to see how easy it is to fix dents in finished hardwood floors. Merely add a bit of water to the dent. It might turn blue, which is “blushing”. And it’s nothing to worry about, as the blue colour fades after the finish dries.
Regardless, use a damp folded cloth to dab away extra water over the water-filled dent. Then, use a hot iron to press down the cloth until it becomes dry. Finally, inspect the dent to see how it looks and repeat the previous method until the dent disappears.
To repair the hardwood floor, suck the water out of the trouble spot with a shop vacuum or a squeegee. Be sure to set the vacuum to “wet mode”.
Tip: Wider flooring vacuum attachments make for an easier and more effective process.
Then, mix a mild detergent with a suitable disinfectant, and stir them in a clean and warm water bucket. Next, use a stiff brush to scrub the floor, but don’t pour any water on the floor. Instead, rinse the brush in the water constantly.
If you come across areas with mould growth, scrub them with TSP (trisodium phosphate) to remove the mould. Then, rinse the spot with water, and dry it with a cloth.
For your floor to dry, you can open the windows and doors and put carpet driers or big fans by the doorway to permit more air into the room. Moreover, dehumidifiers and heaters can reduce the moisture for optimal results.
Tip: Don’t open the doors and windows if the humidity outside is higher than the humidity inside.
Afterwards, you might notice some cupping (floorboards bending up or down). If the cupping is minimal, a drum sander or orbital sander can help you sand the flooring. If it’s more severe than that, sanding may not be an option. Instead, you’ll have to nail the floorboards back in place.

When learning how to get scratches out of wood floors, the answer is sanding. Use fine-grained sandpaper to rub that spot of your flooring in the wood grain direction. But note that this process will do away with your stain.
So, choose a hidden spot to test a wood stain, and see if it matches the colour of your floor before applying it elsewhere. Also, patch test different urethane finishes to find the right one, whether that’s water or oil-based.
Tip: If your floor has a polyurethane finish, it might not be difficult to sand it. However, you can dip a scouring pad in mineral spirits and use that or use a sanding screen to make the sanding easier.
Flooring gaps happen for various reasons. First of all, extreme moisture and temperature levels can get your floorboards to contract and expand. So, the heat would make your wood expand, and the cold would make it contract. Accordingly, these fluctuations may create gaps over time.
Second of all, improper acclimatization is another reason. When your flooring hasn’t been equipped for its new environment, this lack of acclimatisation can separate floorboards.
Third of all, gaps can widen due to originally small gaps for contraction and expansion; about 10 to 15mm around your room’s perimeter is the average. Fourth of all, if your wood boards haven’t been installed properly, they can gradually develop gaps.
But what matters most is how to fix gaps in wood floor, and you can do so with a DIY mix. To make your dust and resin mix, add sawdust of your flooring’s colour to clear resin filler, creating a firm paste. And fill the floorboard gaps with this paste using a spatula. This method should fill your small gaps appropriately.
Wood floor discolouration is the result of several conditions. If your floorboards are subjected to extreme weather conditions, such as rain or UV, their pigment can start to fade, lightening their colour. Furthermore, wood rot can change your wood’s colour, especially if it’s brown rot.
And iron staining is also a possible reason for wood discolouration. So, if your wood was sprayed with a grinding metal or a welding splatter, water can make it rusty and create black botches.
As for how to deal with discolouration, you need to set up your floor buffer with a 60-grid screen. Then, run it forward and backwards in the board’s direction; this should remove the shine. And be careful not to dig deep into the wood but just enough to get rid of the discolouration. Then, vacuum the wood thoroughly.
Afterwards, load the floor buffer with an 80-grid screen, and repeat the previous steps. Then, load it with a 120-grit screen, and repeat for the third time. Now, you can use a paintbrush to brush polyurethane on the floor and in the floorboard’s direction. This should create an even coat.
Then, give your floor 8 hours for the shine to set. And to dull it, sand the floorboards with 220-grit sandpaper, and remove the dust. And you can proceed with adding another polyurethane coat, letting it set, sanding it and doing the previous steps. Finally, a third coat is needed, which requires 24 hours to set.
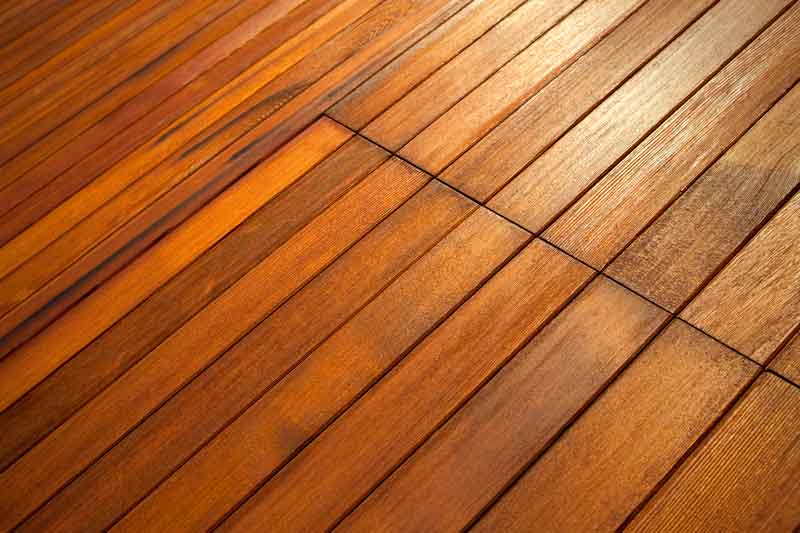
Sometimes, you can’t reverse the damage, and you’re left with no choice other than to replace your wood flooring. To do that, you should:
● Remove any nails with a nail puller or set.
● Make a perpendicular line over the section that needs replacing using a carpenter’s square. If all your wood requires replacing, skip ahead.
● Drill holes by the marks you’ve made with a power drill and 1/2 or 3/8-inch-diameter spade bit.
● Cut the damaged boards in half with a wood chisel.
● Take out the damaged floorboards.
● Use a sharp wood chisel to square up the drilled ends, which makes for a smooth installation.
● Cut out boards to replace the damaged ones, and make sure they match them in size.
● Remove the bottom side of the board’s groove. This should allow you to install a board between two other ones, tongue side in first before putting its groove side in place.
● Try fitting a floorboard, and if it doesn’t fit, cut it again.
● Take out the new strip to apply construction adhesive to its backside. Then, reinstall the board, and tap it in place.
● Insert nails into the boards with 2-inch-long ring-shank flooring nails, and use a nail set to get the heads just under the floor surface.
There are several tools for sanding. To start with, the drum floor sander works for most floors. But it can’t be placed close to the walls, so you can’t use it to sand the room’s perimeter. Instead, an edger would be good for that purpose.
Speaking of edgers, they’re also great sanding tools for shallow areas that drum sanders can’t reach. Also, there are random-orbital sanders, which are vibrating tools that create ultra-smooth sanding. And you can learn more about how to sand wood floors for a more informed project.
One of the solutions for how to remove scratches from wood floor is to apply store-bought chemical abrasion kits. The chemical solution prepares your flooring and eats your old finish away. Then, you can use a new finish coat to revive your flooring. And always consult the abrasive manual for more details.
Another solution is to buff your floors and recoat them with polyurethane. When learning how to restore scratched real wood floor, you’ll come across this method. All you have to do is rough up your wood with a buffer and use screening. Eventually, you can spread the polyurethane finish.
Lastly, you can use a water-based polyurethane revitalizer finish. Get a revitalizer from your local home improvement store. Use it to fill in scratches; give your floor a glossy finish, and let it dry. This is probably the easiest and most budget-friendly solution if you’re looking for an easy DIY to revive your home or impress your tenants.
We’ll go over some things that damage your hardwood floor so that you can look out for them in the future.
Firstly, although rug pads can fix your rug in place so that it doesn’t slide, some types leave marks on your floor. And rubber-backed mats may change your floor’s colour and dull its lustre. So, it’s recommended to use pads that contain rubber and felt.
Secondly, hardwood floors can only take minimal wet cleaning. So, drenching your floor in a cleaning solution isn’t a good idea. Instead, use a damp mop or cloth.
On the other side of the coin, the third reason for hardwood floor damage is neglecting to sweep your floors altogether. This causes the accumulation of dust, dirt and other harmful particles.
Tip: Add a mat by the door to keep the outdoor germs out, and wipe your shoes on it every time you enter. This way, there’ll be less dirt for you to sweep.
Fourthly, high heels have pointy heel caps and don’t distribute body weight evenly, leaving dents. So, taking them off by the door is preferable.
The fifth and final issue is pet scratching. Cats and dogs can scratch your hardwood floor and damage it. But if you trim their nails regularly, you can protect your flooring.
As a parting gift, let us give you some bonus repair hacks that actually work. So, if you’re googling how to remove scratches from real wood flooring, you’re in luck.
The Tibet Almond Stick Almond Scratch Remover is highly effective, thanks to its secret family formula. This colourless remover eradicates surface scratches and is user-friendly. You can merely open the can, take out the stick, unwrap the blue wrappers and rub the wrapper’s end on the scratch. Then, it should fade instantly.
Additionally, we can’t cover how to get rid of scratches on wood floor without one of those DIY timeless, quick, and cheap solutions. You need vinegar and double the amount in water, mix them and dip a sponge in the solution. Then, scrub the floor with it; dry the floor with a towel, and apply a coat of a scratch cover product like the Old English Scratch Cover for Light Wood.
Furthermore, you can use walnuts to remove the scratches on your wood. Create friction between your fingers and the scratched spot to warm it. Crack the walnut, and rub its meat over that area. Don’t stop until the walnut’s oil has soaked into the wood after a few minutes. Then, wipe the area with a soft cloth.
All in all, there isn’t a one-size-fits-all solution for damaged wood. The suitable method depends on the type of floor, type of finish and type of damage your floorboards have endured. Is it scratches, gouges, dents, gaps, water damage, or discolouration?
Moreover, the gravity of this damage also matters. For instance, we can tell you how to restore scratched real wood floor if it has a surface scratch, but more severe ones might require a professional.
Sometimes, if the damage is too severe, replacing your wood floor becomes your only option. But other than that, you can follow our instructions to fix your flooring’s type of damage and restore your wood to its original glory.