


(0)1622 589 999

info@allfloorstradecenter.co.uk

The right flooring updates can improve aesthetics, correct structural problems, increase home value and make your floors more durable.
So, how do you select the right flooring materials for your property?
While aesthetics are a big deal during a flooring renovation, basic everyday use matters as well. For instance, solid wood flooring typically increases a home's value and is durable, but it's a poor choice for moisture-prone areas like bathrooms and basements.
Read on to discover crucial information you should know about before planning your upgrade, including the best floor renovation ideas.

Floor renovation is the process of restoring an old floor, installing a new one, adding underlayments, or repairing an existing floor to enhance its aesthetics, functionality, and lifespan.
The specific tasks involved vary based on the following:
The procedure for floor refurbishing varies based on the type of flooring material (hardwood, tiles, vinyl) and the extent of the renovation.
For example, updating a hardwood floor might involve sanding and refinishing the wood, while renovating a tile floor will involve removing and replacing the tiles.
The questions below will help you understand how to go about your flooring renovation project.
The decision of whether to restore or replace your floor should depend on a professional flooring assessment, your preferences, and your budget.
Sometimes it's possible to restore or cover an old floor with new material. And at other times, replacing the floor is the best option.
The table below shows a breakdown of when to change or restore the existing floor.
| Reasons for Changing the Floor | Reasons for Restoring the Floor |
| Severe damage, such as water damage, deep cracks, or significant warping | The floor is generally in good condition with minor damage |
| Extensive wear and tear, compromising the floor's structural integrity | A low floor renovation budget |
| A desire for a completely new look or floor material | The floor type is ideal for restoration—for instance, hardwood flooring |
| The floor type isn’t suitable for restoration. For instance, laminate or vinyl floors | The desire for an eco-friendly floor refurbishing option |
Your floor renovation budget will depend on the flooring material, the area's size, the contractor's rates, and the extent of the renovation required.
You should figure out how much you're willing to spend on the project. It will help you choose the materials and flooring renovation companies that suit your budget.
You can estimate the floor renovation cost by calculating the materials needed, finding the unit cost of the flooring material, and researching the average labour cost in your area.
You can also skip the hassle by consulting with a reputable flooring contractor. They can assess the scope of your project and give you an estimate of the cost.
Do you prefer a cosy, warm ambience with hardwood, a modern and sleek appearance with tiles, or something else?
Flooring renovation allows you to create your desired ambience. Choose materials, colours, finishes, and textures that align with your vision to create a comfortable, inviting, and aesthetically pleasing space.
You might achieve your aesthetic preferences by restoring an old floor, painting, or replacing it with a different one. Think about all the options that can help you achieve your desired outcome and consult an expert.
Do you want a kitchen, living room, bedroom, office, or bathroom floor renovation?
The area you want to refurbish will affect the type of flooring material you choose, the project's cost, and the amount of disruption to your home or business.
For instance, kitchens, bathrooms, and basements require highly resistant, water-repellent, and easy-to-maintain flooring options.
Living rooms for homes with pets, kids, and the elderly should have non-messy and slip-resistant flooring materials.
Do you plan to renovate the floor yourself or hire a specialised contractor? The decision is personal, but both approaches have pros and cons.
If you do a DIY floor renovation, you’ll save money on labour costs, have more control over the project, and choose the materials or finishes you want. However, you must have the time and skills necessary to complete the project.
If you hire an expert, you’ll have the peace of mind of knowing that the project will be done correctly. You can also get a floor warranty this way. However, you will have to pay for labour costs, which can be expensive.
Moving out during a floor renovation can be inconvenient, but it’s not always necessary. It depends on the scope of the renovation and the size of your home or business.
For major projects or areas with limited access, temporary relocation might be necessary to ensure safety and a smooth renovation process. Most refurbishing projects take a few days.
You should discuss your options with a contractor to determine whether or not you need to move out.
Is the subfloor stable, free from damage, and suitable for the new flooring?
Assessing the subfloor's condition ensures you have a solid foundation for the renovation and avoid future problems with the new floor.
Repair any damage, ensure it is level and sturdy, and address issues like squeaks or moisture to create a stable and long-lasting base for the new flooring.
A specialised flooring expert can advise you on the condition of the subfloor and the best choices for the floor you want to install.
The cost of floor renovation in the UK can vary from £100 to £1000 or more. Reasons for cost variation include size, floor type, flooring brand, property type, labour, and floor condition.
The flooring type you choose for your property can significantly impact the overall look and feel of your space. It can also affect the value of your premises, comfort, and safety.
Depending on their use, you might also choose different floor materials for various rooms.
Let's explore the most common flooring types for renovation.
Do you want to renovate your wood flooring or replace your existing floor with wood? It’s a popular and timeless flooring option that can add to your home value.
Hardwood floors are durable, versatile in design, and easy to restore. If you recoat and refinish them every few years, they can last even longer.
Fixing and refurbishing old wood flooring might include:
If you're installing wood flooring for the first time or changing your existing flooring material, you'll have plenty of options to choose from, including:
High-quality carpets are the best flooring option for areas where you want sound insulation, warmth, and a cosy feel underfoot.
You're guaranteed to find a carpet style that suits your needs in terms of colours, patterns, textures, and materials.
Do you already have carpet flooring in your home or workspace? Carpet flooring renovation can help to revitalise the carpet's look, extend its lifespan, and maintain a clean and hygienic environment.
The renovation process may include deep cleaning, spot treatment, patching or repairing damaged areas, re-stretching the loose carpet, or completely replacing it if worn out or beyond repair.
Does your flooring renovation project involve the bathroom or kitchen? Vinyl floors might be your best selection for those humidity-prone rooms.
Vinyl flooring is a versatile and cost-effective option for floor renovation. It's made of synthetic materials, available in various styles and designs. Vinyl offers durability, water resistance, and easy maintenance and can mimic the look of other flooring materials like hardwood or tiles.
Vinyl flooring renovation includes replacing damaged tiles or planks.
Do you want to make your old laminate flooring look better and last longer? Laminate flooring is made of compressed wood fibres with a printed image of wood, stone, or other materials on top.
You can't refinish it because it isn't solid wood, but you can restore it or install a new one.
Laminate floor renovation for dull or weather-beaten spaces involves etching the surface and applying a new finish. You can use a floor repair marker to hide minor scratches. The secret is to prepare your laminate flooring properly and use the right tools, products, and techniques.
If it's major damage, like water-damaged boards, you'll need to replace those sections. Laminate is also a great flooring option when considering an upgrade because it's budget-friendly and durable.
Can you redo the linoleum flooring? Linoleum is a resilient flooring option made from natural materials like linseed oil, cork powder, wood flour, and mineral pigments.
The extent of the damage determines if and how you can refurbish linoleum flooring. For faded lino flooring, you can paint it and transform your space with minimal investment.
If you want to change your linoleum flooring without tearing up the old floor, you can install peel-and-stick vinyl tiles, plywood, or other materials over it.
Tiles are available in various materials like ceramic, porcelain, or natural stone. And you can update tile flooring in various ways, with the cheapest option being painting.
Tile refinishing or reglazing makes it cheap and easy to change your tile flooring colours without replacing them. It's a tile renovation technique that involves applying an epoxy or resin coating.
It's ideal for still structurally sound tiles that have lost their shine, colour or have become stained or worn out over time. But for major damages, you might have to tear out old tiles and replace them or install tile over the tile.
Tiles are also a cheap and easy-to-install option if you want to remodel your flooring.
Renovation of wood floors means refreshing or restoring existing wood flooring to improve its appearance and condition. The process may include sanding, refinishing, repairing damages, and applying new coatings to bring back the floor's natural beauty and extend its lifespan.
Restoration aims to maintain or bring back the original charm or condition of the flooring. On the other hand, renovation focuses on updating, restyling, adding to, and repairing the floor to give it a new look and feel.
Flooring remodelling involves making significant changes to the floor's design, layout, or structure via demolition and construction while floor renovation focuses on updating or restoring the existing floor's appearance and condition.
Do you want to approach your flooring renovation project correctly and choose durable and fitting materials?
At All Floors Trade Centre, we have the expertise to help you choose and install the right flooring solution for each area of your property. We can also help you plan and design your space hassle-free.
If you're in London, we're the right carpet and floor renovation company for your project.
Contact us now for a design consultation, flooring advice, or quotes.
Flooring can lose its lustre and experience wear and tear over time. You may want to learn more about flooring restoration if you’re seeking ways to restore its former beauty and functionality.
At All Floors Trade Centre, we aim to empower homeowners and property owners like you with the knowledge to restore your flooring successfully.

Flooring restoration is a process usually done by professionals to renew and revive different types of worn-out flooring, whether they may be wood, LVT, stone, or concrete.
This is executed to recreate the flooring’s original beauty and ensure it stays safe and functional. It’s a cost-effective way to enhance a place's overall aesthetics and value compared to floor replacement.
There are many reasons why floor restoration can benefit homeowners like you. The main perk is that your damaged, old flooring will look new again.
If you’re still contemplating whether to perform floor restoration, you should look forward to these perks too:
The process can look different from one floor to another. However, you may find that the usual steps generally include:
Floor restorations always start with a thorough assessment of the flooring’s condition. Here, a professional will inspect the floor’s surface to determine what needs to be done in a specific area.
The furniture and appliances will be removed from the room. If you had carpet installed a long time ago, you might also need to pull them back to reveal the real state of the flooring.
A proper floor restoration doesn’t start until the canvass is clean. Professionals will need to remove any dirt and debris from the floor. If needed, any existing coatings and finishes should also be removed.
Floor cleaning can require quick sweeping or hoovering. In some cases, specialised cleaning agents should be used.
Necessary repairs should be addressed depending on the result of the assessment. It typically accounts for most of the work, as it involves fixing various damages, imperfections, and wear that may have occurred over time.
This can involve fixing cracks, re-sticking loose materials, and fixing chips on the floors. Patching may be done in case there are deep cuts, set-in stains, or areas where the protective coating has worn away.
Sealing is done depending on the floor type. This protects the floor from stains and moisture.
Once the seal is dry, the floor is buffed to produce a smooth and even surface.
Certain types of flooring can be restored to regain their beauty and functionality. We’ll talk about different flooring types and how they can be revived.
Wood flooring restoration revitalises various types of wood and brings out their natural beauty.
Wood flooring is prone to damage. Some common causes include rug pads made from hard materials, wet cleaning, or friction from certain shoe types. But the good thing is that they’re fairly easy to restore.
Here are several types of wood flooring that can be renewed:
The process of wood flooring restoration includes the following:
Floorboard restoration refers to repairing wooden floorboards that may have experienced wear and tear over time, including water damage, stains, scratches, and gouges.
Unlike wooden flooring, floorboards are thinner, narrower, and commonly used in older homes. These floors often feature pine, oak, or maple wood.
A lot of floorboard floorings can be repaired to look new, such as:
Here are the common steps for restoring floorboards:
Laminate restoration requires repairing several fused layers, including a photographic top layer designed to mimic wood, stone, or other materials.
Laminate flooring is popular due to its durability, easy installation, and cost-effectiveness. However, it can be damaged by water exposure, scratches, dents, peeling, chipping, and buckling.
Here are the types of laminate flooring that can be restored:
These are the steps for restoring laminate flooring:
Stone flooring restoration aims to revive the durability and timeless beauty of natural stone floors.
Stone flooring can sustain damage from scratches, stains, water intrusion, chemical exposure, and wear and tear.
However, over time, certain types of stone flooring would need restoration, such as:
The restoration process generally involves the following:
Tile restoration involves renovating damaged living room, kitchen, or bathroom tiles.
These tiles, though durable, can crack, chip, or misalign due to heavy impact or improper sealing or installation.
Most types of tile flooring can be repaired, including:
To restore tile flooring, professionals will:
Concrete restoration is done to reconstruct the concrete to its original condition.
Concrete floors can suffer damage from heavy impact, acidic cleaners, improper sealing or installation.
Here are the common types of concrete flooring that can be repaired:
And here are the steps for restoring concrete flooring:
The duration before another restoration can be done depends on various factors and may not be the same for different types of flooring.
Some flooring types, like wood, are strong enough to be restored every seven to ten years. Meanwhile, concrete and tile flooring can last longer, sometimes even a decade.
It will depend on certain factors like:
The cost of floor restoration can vary.
Professionals may charge around £4 to £25 per square metre for wooden floors. Tile installation alone can range from £15 to £70 per square metre, excluding removal. On the other hand, stone flooring restoration may cost between £150 and £500 per square metre.
The average cost of laminate flooring removal is approximately £14 to £20 per square metre, while laying new laminate flooring can be around £20 to £30 per square metre.
These numbers are just the average costs in the UK. Depending on the company you'll hire, you may score a cheaper or more expensive deal.
Each company offers its level of service, including the quality of the material they’ll use, their expertise, and their techniques.
A professional’s hourly rate also causes the price of floor restoration to vary. For instance, the minimum wage in London is higher than in other areas, so you may pay more if hiring professionals from there.
Some key factors determining the average cost include the total area to be restored and the extent of the damage.
It’s possible to repair minor damages on your own, but it’s better to seek professional help from experts like us at All Floors Trade Centre for severely damaged floors.
DIY floor restoration offers advantages such as:
But take note of the following when doing it yourself:
On the other hand, you can enjoy these advantages when hiring a professional:
Here are the only possible drawbacks of a professional flooring restoration:
You may need to do a floor replacement.
In such cases, you can consult with professionals like All Floors Trade Centre to find suitable flooring options that fit your needs and preferences. We can work together to find replacement flooring that’ll work for you, whether it’s vinyl, LVT, carpet, or real wood.
Many homeowners can opt for flooring restoration when they want to bring back their floor’s natural charm and functionality without the hefty cost of replacement. Now that you know the step-by-step process of restoring floors, you can confidently start your renovation journey.
Reach out to us at All Floors Trade Centre today. With our expertise in all LVT flooring, we’re equipped to handle extensive repairs and restoration for Kent and London households and commercial areas.
If you’re looking up “the best luxury vinyl flooring UK,” you’ve come to the right place. Luxury vinyl flooring (LVT) is nothing like the dated floors of the seventies. Instead, this modern flooring type comes in almost infinite options, styles, and prints of vinyl flooring.
Of course, this variety can make your choice a rather difficult one. After all, you have to consider your budget, the location where you’ll install the flooring, the anticipated amount of foot traffic, and other factors.
This is why we, at All Floors Trade Centre, have made it our mission to help you. So, without further ado, here’s our comprehensive guide on choosing the ideal luxury vinyl flooring for you.
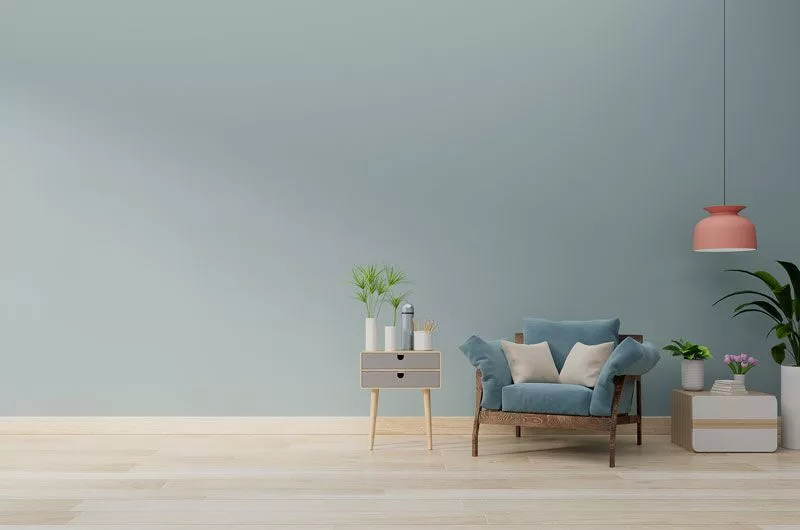
This type of flooring is found in multi-ply planks and tiles. And it’s made of PVC vinyl.
Moreover, luxury vinyl flooring contains six to eight layers of materials. To elaborate, this includes a clear topcoat layer for lustre, a transparent wear layer for a protected design, a design layer with the print, a cushion foam layer for added comfort when you walk, a fibreglass blocking layer, and a PVC backing layer for sturdiness and rigidity.
Furthermore, if you opt for stone-look luxury vinyl, it might have pulverised limestone or some type of ground mineral.
In addition, its wear layer can be anything from 2mm to 8mm thick. As a result, it’s much more rigid and thicker than standard vinyl.
Firstly, vinyl plank assumes the appearance of hardwood floors with various wood colours, grains, and textures. It’s better than real wood in that it’s water-resistant, stain-resistant, and easier to maintain.
Secondly, where a vinyl plank resembles wood, a vinyl tile resembles stone. It’s available in multiple sizes, colours, and patterns. If you have a small space, vinyl tiling can fit in easily. Also, it’s easy to replace in case of any damage.
As for the third type of luxury vinyl flooring, that’s vinyl sheeting. It’s a roll that can be 12’ wide. So, you can spread it over large spaces. Not to mention, it’s durable and budget-friendly, which probably explains its popularity. Also, if you already have flooring, you can easily lay vinyl sheets over it.
In terms of build material, there’s no difference between LVT and LVP. But let’s cover the pros and cons of each so that you can make up your mind.
If you love the luxurious look of stone or ceramic tiling, LVT is your best bet. It’s effortless to install, thanks to its interlocking or “floating” installation. And it’s water-resistant or even proof.
Nevertheless, we have to note that LVT doesn’t exactly feel like real stone. Also, it’s more expensive than porcelain and ceramic tiles.
Otherwise, if you learn towards the classic look of wood, LVP assumes its appearance. It’s also comparable to laminate flooring and is ideal for small spaces. And like LVT, it’s easy to install, meaning that you can certainly DIY your way through it. Moreover, it requires little maintenance with water-resistant and even waterproof specs.
On the downside, LVP doesn’t possess the texture of solid hardwood. Also, it may be more expensive than laminate options.
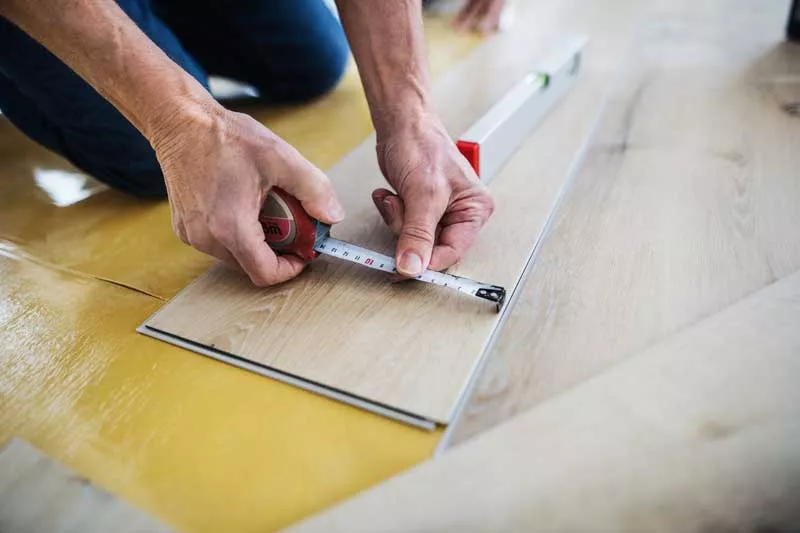
Luxury vinyl plank flooring requires less upheaval in installation than tile flooring. Otherwise, the latter will probably necessitate professional installation.
With luxury vinyl flooring, you can buy a quality product for a reasonable price. Alternatively, tiles, stone or ceramic, are costly. Furthermore, LVT is sturdy and can handle most of what might hit it. But tile flooring is likely to crack under weights, and it’s also more expensive to repair.
There’s no clear-cut answer to this question. But luxury vinyl plank flooring is a solid option. To illustrate, it’s durable, affordable, and easy to install and clean. It also doesn’t scratch easily. Not to mention, it has a comfortable underfoot. And with its water resistance, you don’t have to worry about damaging it with wet mopping or spillage.
These are all perks you need in a high traffic room because they enable your floor to remain undamaged and clean.
Luckily, luxury vinyl flooring needs little maintenance. Adjust your steam mop to a low setting, and use it to clean your vinyl. But if you want to clean off a stain or spill, you can merely sweep the floor with it.
Also, note that applying abrasive scourers on vinyl floors is a no-no, as it can damage your floor.
If you want to install luxury vinyl, here are the materials you need:
Now, let’s go over the steps of installing luxury vinyl. Before you can lay the vinyl flooring, you should check the floor to ensure that it’s flat. In other words, you need to remove any nails, concrete lumps, humps, and dips if they’re over 2mm in a 1metre run.
Then, you can acclimatise your LVT. That means leaving the closed boxes with your flooring in the room you’ll install it in for 48 hours before you lay it. Note that the heating conditions should be regular and the temperature should be 18 to 28 Deg.
Afterwards, you should place an LVT underlay or a self-adhesive vinyl tile underlay. This foam layer provides your flooring with sufficient support. Also, make sure to roll out the underlay at a right angle to the floor installation’s direction.
Finally, you can install your LVT floor over the underlay. To elaborate, start against a straight wall with 7-10mm spacers. This way, the gap between the LVT board and wall is even. Then, switch up the direction of the flooring at least every 7m as well.
Experts recommend that you order more flooring than you need. But how much extra flooring exactly do you need? Luxury vinyl planks and tiles only require an additional 5 to 10%. That’s because your planks will probably not fit exactly, with some cut edges and loss of material.
For instance, you might have a 200 square feet space. In that case, you should get 210 or 220 square feet of luxury vinyl flooring.

Generally, vinyl flooring of 2mm thickness tends to be low-quality. Otherwise, good vinyl flooring products are 8mm thick or more. Thickness is even more critical if you’re buying a particular type of luxury vinyl, click flooring.
After all, the thickness makes installation more manageable if you’re buying the best vinyl click flooring. So, tiles should be at least 5 mm thick.
Tip: You don’t want to disrupt the transition between rooms by installing flooring in one room that’s noticeably higher than that in another.
To begin with, you can install luxury vinyl flooring with underfloor heating. It’s a good idea because this flooring type will expand or contract to accommodate the room’s temperature. Nevertheless, make sure the temperature of your LVT flooring doesn’t exceed 27c.
Tip: A thermostat with a floor sensor can keep the temperature in check, ensuring that you don’t damage your floor surface.
If you’re looking for the best vinyl flooring (UK 2021), we’ve got you. Here are the best vinyl flooring brands, UK, that you should check out.
Whether you’re looking for residential or commercial flooring, Amtico vinyl flooring can help. Its 50 years of experience are evident in its durability, practicality, and quality. Down below are some of its top-quality vinyl flooring options:
Moving on, Karndean isn’t any less established among LVT flooring brands than its predecessor with 40 years of experience. Karndean flooring services residential and commercial settings. Examples of the brand’s collection include:
Another notable brand is Quick-Step Livyn, making use of brilliant technologies.
As for a leading force in LVT flooring, that’d be Kahrs, as it’s been around for over 160 years.
Finally, Bentley has been creating LVT flooring products for 40 years with a versatile collection. It includes:
Portofino Rigid Core: You’ll appreciate the Rigid Core collection if sturdiness and safety in flooring is your priority. It features Bfl-s1 fire resistance, wear resistance, and more.
There’s no straightforward answer to this question. But you’ve read our luxury vinyl flooring reviews UK, in which we’ve discussed the best LVT flooring, UK. Still, we might say that it’s a tie between Karnean and Amtico. So, we’ll tackle a couple of aspects that showcase their slight differences to help you make a decision.
For one, if your priority is thickness, Karnean flooring is impressively thick, with wear layers up to 0.7mm thick. Amtico’s products aren’t as thick with 0.55m wear layers. They’re still thick, though. In terms of warranties, Karndean offers a 20-year warranty. But Amtico provides a lifetime warranty on its signature range.
For luxury vinyl planks, we’ll go with Proximity Mills’ products. We love how Proximity Mills provides what’s probably the best value LVT flooring. The brand cuts down on intermediaries to keep its products budget-friendly. Also, it’s run by the manufacturers of some of the most expensive vinyl flooring brands, so we trust its quality.
In other words, the brand combines quality with affordability. Last but not least, it’s enthusiastic about sustainability and environmentalism.
For luxury vinyl planks, we’ll go with Proximity Mills’ products. We love how Proximity Mills provides what’s probably the best value LVT flooring. The brand cuts down on intermediaries to keep its products budget-friendly. Also, it’s run by the manufacturers of some of the most expensive vinyl flooring brands, so we trust its quality.
In other words, the brand combines quality with affordability. Last but not least, it’s enthusiastic about sustainability and environmentalism.
Overall, luxury vinyl flooring is an ideal flooring type if you choose wisely. So, consider what your priorities are, whether that’s water resistance, easy installation, easy maintenance, durability, patterns, or else.
Then, compare luxury vinyl flooring options we’ve recommended and others to see which aligns best with your priorities. Despite how overwhelming the process may seem at first, this guide will help you narrow down your options and choose the best vinyl floor covering for your space.
There’s no end to trip and slip accidents on floors, causing anything from mild to severe injuries. For that reason, anti-slip flooring can be a lifesaver, but what is safety flooring? We’ll address that and more. So, tag along to learn more about safe flooring, its benefits, and styles.
Anti-slip waterproof flooring is a type of flooring that reduces the slip risk, creating a safe environment in low and high traffic areas. With the use of safety aggregates and particles, friction between the floor and your foot increases.
So, in cases of contaminant spillage, you and your family members are less likely to be injured. In short, the flooring has higher traction and underfoot safety.
Still, how can you tell that a product is indeed slip-resistant in wet conditions? Simply put, it should follow the European standard for particle-based safety flooring, EN 13845. As for products that meet other flooring standards, including EN ISO 10581/10582, EN 649, EN 548, EN 12199, and EN 1817, they aren’t classified as safety floors.

Typically, spilt contaminants on the flooring, including grease, water, and shampoo, create a squeeze film between your foot and the floor.
However, non-slip floor covering uses aggregates in its wear layer during production. And the aggregates merge with the floor’s surface, making for a harder friction surface.
Then, enough high-quality aggregates penetrate the wet film. And they make contact with your shoes or prevent dry contaminants’ ball bearing effect. This way, pollutants have less of an impact.
If you’re wondering why you should install safety vinyl flooring, the peace of mind that this flooring grants you is priceless. In places with high foot traffic, you can rest assured that your anti-slip vinyl sheet flooring or other anti-slip floorings will minimize the slip risk.
In terms of hygiene, non-slip vinyl sheet flooring and other similar types are easy to maintain and clean because they don’t absorb spillages and resist bacteria and germs. Accordingly, they can be the perfect match for healthcare facilities. And speaking of maintenance, you might want to check out our tips for effective floor cleaning and maintenance.
Moreover, slip resistant vinyl flooring is highly durable and hard wearing, which makes it a worthwhile investment.
We’ve already alluded to this when we called non-slip flooring non-slip vinyl flooring. But aside from vinyl, the flooring contains quartz, silicon carbide, and aluminium oxides, which contribute to its anti-slip feature.
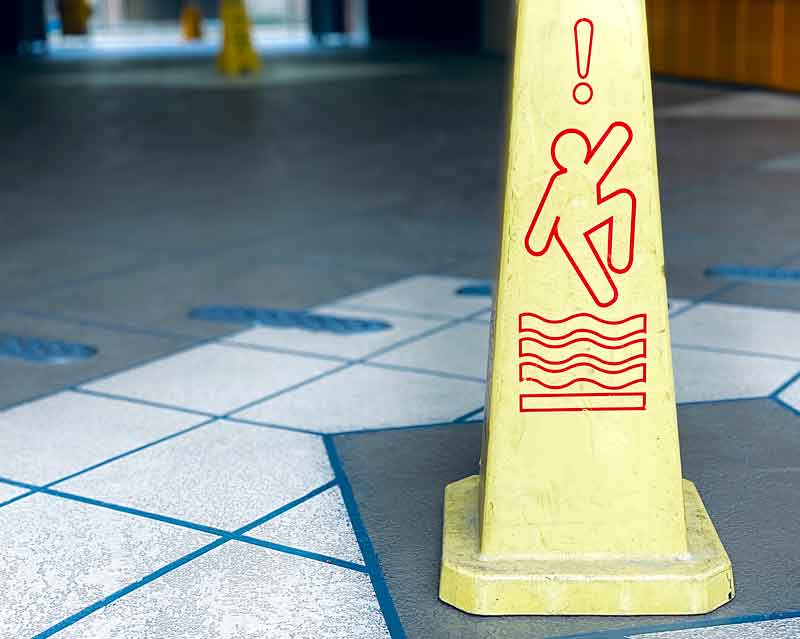
Non-slip cushioned vinyl flooring is designed for work environments, commercial use, and public spaces, including shops, schools, and hospitals because of its hard-wearing nature.
But you may wonder if non-slip vinyl click flooring gets wet when it’s slippery. It may get wet, but it handles water impressively well. So, you can clean it with a traditional mop and bucket; there’s no need for expensive specialised cleaners and polishers.
First off, we want to establish the fact that there’s a difference between high risk of slipping environments and very high risk of slipping environments.
But don’t worry because we can help guide you to purchase your dream flooring. Just contact us at AllFloors Trade Centre. You can use our number 01622589999, our email address, info@allfloorstradecentre.co.uk, or our online form. We’ll be happy to assist you!
A very high risk of slipping environment can be hazardous, as contaminants are always there and you can’t avoid spillage. That’s certainly the case for swimming pool areas. However, a high risk of slipping environment is one where the contaminant is spilt, like water, soap, and so on.
Luckily, there’s a solution to implement in very high risk of slipping environments: slip resistant flooring. At All Floors Trade Centre, we offer a wide selection of safety flooring options with sustainable slip resistance, hygienic properties, and barely any maintenance required.
Furthermore, slip resistant flooring can be used in hospitals, schools, nurseries, toilets, bathrooms, kitchens, retail sectors, and care homes.
If you want to learn more about our products, feel free to contact us.
A high risk of slipping environment is one with an increased risk of injury due to slipping. We’re talking about a surface with a spilt substance, such as water, on top of it. So, that can happen in kitchens, bathrooms, and more.
High risk of slipping environments differ from very high risk of slipping environments in that the substance or contaminant isn’t constantly present, so there’s less chance of injury involved.
According to the North Carolina Department of Labor’s “A Guide to Fall Prevention in Industry”, when we look at the least slippery flooring types, they usually have the following features:
Furthermore, slip resistant alternatives are asphalt, wood, cork, low-pile carpeting, and more. And when you couple anti-slip flooring with proper installation and maintenance, you can indeed prevent slips and falls. Now, let’s dissect these flooring alternatives.
To start with, asphalt is probably ideal for damp conditions. It’s also cheap, so you can use it for a residential basement or any commercial use. However, we have to note that asphalt tiles are very challenging when it comes to their removal. So, only opt for asphalt if you’re sure you want to keep it.
Moving on, non-slip wood flooring is a classic and aesthetically pleasing option. Usually, you’ll find it in residential spaces, but it can also exist in commercial areas. Additionally, manufacturers add artificial abrasives or metallic particles to the flooring’s varnish to make it safe.
Tip: If you’re going for hardwood flooring, we’d recommend cleaning off spills instantly and not using area rugs.
Furthermore, cork isn’t just a type of slip resistant flooring; it also absorbs sound and offers you cushioning underfoot. As for its production, manufacturers blend compressed and moulded ground cork bark with natural cork resin. Then, they heat-cure the components under pressure, thus binding them.
Unlike asphalt, cork is expensive. And it’s found in commercial and residential settings. The one downside is that cork isn’t sustainable, as it requires removing the trees’ bark rather than cutting it down.
And another type of slip resistant flooring is low-pile or indoor-outdoor carpeting. It employs manufactured fibres (like olefin) or natural fibres (like jute). A low-pile carpet isn’t only resistant to stains but also ultraviolet light.
Additionally, it might feature marine backing to handle moisture if it’ll be placed in damp areas. Usually, a non-slip floor covering is used in sunrooms and porches.

Kids are always getting into accidents, so it’s especially crucial to make their spaces slip resistant, whether that’s a playroom, playground, or kids’ room. So, let’s delve into some features to look for when you’re choosing the ideal safety flooring for kids.
Firstly, in a playground with equipment, kids need fall protection. This way, if they fall off any equipment, they aren’t severely injured. So, opt for flooring with the required fall height protection rating. In other words, it should at least match the height of the tallest playground equipment piece.
Secondly, playground flooring should have good traction. And if you’ll use it outdoors, its traction should remain solid even in wet conditions.
Thirdly, since flooring for kids will probably witness plenty of traffic, it should be durable. That’s especially true for public and commercial settings.
Fourthly, if the playground is going to be outdoors, it should have a quality drainage system, be UV protected or stable, and be weather-proof. This way, outdoor conditions won’t undermine its quality.
Tip: If there are other features that you require in your kids’ flooring surface, such as flooring that can be used with underfloor heating, make sure that your flooring type is compatible with that.
If you’re looking for non-slip kitchen flooring, we’ve got you. Kitchens are constantly exposed to moisture, dirt, and spills. Not to mention, the entire family probably keeps walking in and out every second. For those reasons and more, it’s best to use the following types of flooring for kitchens.
First of all, hardwood flooring is durable, water-resistant, and warm. And how resistant it is to slipping depends on its finish. However, prolonged exposure to moisture can undermine hardwood’s quality. Second of all, non-slip laminate flooring is waterproof, warm, and easy to install. It also resembles traditional hardwood.
Third of all, safety tiles are a durable solution for wet areas. This is also the most commonly used flooring for kitchens. And it has multiple types, so you have non-slip vinyl flooring for kitchens, ceramic, porcelain, natural stone, stained concrete, and much more.
Speaking of non-slip ceramic and porcelain, this type can handle messes, splatters, and spills. However, it would be best if you still cleaned it fast to avoid grout staining. As for porcelain, it’s 100% waterproof and highly durable. Typically, these non-slip varieties look like wood or natural stone.
Otherwise, non-slip vinyl flooring may use foam or cork backing for a soft underfoot. And it’s waterproof as well. As for stained concrete, the regular varieties are slippery due to their finish. But some options are certainly less slippery. They’re also very durable and waterproof.
Before we get into the best flooring for a wet room or an open shower, we should establish what that is exactly. A wet room is a bathroom with tanked floors and walls. That’s to say that all surfaces are sealed using a type of waterproof membrane, which prevents water damage.
And it usually includes a shower, sometimes with a glass screen. In addition, wet rooms tend to have sloping floors so that water can slide to a drain or waste. This way, you can get rid of excess water.
As for the best flooring for wet rooms, that flooring should preserve the integrity of the bathroom and be safe for you and your family.
Accordingly, we have to go with non-slip vinyl bathroom floor tiles. That’s because of their anti-slip features, flexibility, versatility, and water resistance. On top of that, if you want a non-slip vinyl flooring bathroom, you’ll be happy to learn that it’s easy to install and remove this flooring.
Nonetheless, if you’re looking for other non-slip bathroom flooring ideas, you might want to consider mosaic flooring. This anti-slip bathroom flooring is used in pools as well, thanks to its top-notch slip resistance feature.
Since safety flooring is made to be stain resistant, you can’t stain it with paint and oil. Not to mention, even if you manage to paint it, you’ll be covering its non-slip surface. So, it’ll be slippery, defying the entire purpose of safety flooring.
Ultimately, safety flooring is used in residential and commercial settings to reduce the slip risk, thus decreasing the chances of injury. And the secret lies in using aggregates to enhance the flooring’s traction. Also, safety floors aren’t only safer, but they’re also more hygienic and hard wearing.
Undoubtedly, there are different styles of safety flooring and different levels of risk involved in various circumstances, so you need to assess these different factors to decide on the proper safety flooring to use.
Regardless of it's quality, wood flooring is prone to damage. And hiring a refinisher every time you find a scratch, gouge, dent, gap or else isn’t very practical, but what if we taught you how to fix wood floor surfaces? Whether you’re a homeowner, landlord, real estate investor or property developer, you can handle these imperfections yourself.
Yes, some refinishing can go a long way in repairing your wood floor. So, try out some easy fixes before calling a professional.
How to repair wood floor surfaces relies on the floor type, which applies to other home projects as well, such as installing underfloor heating.
Also, when you have wood floors, the type of finish, whether that’s a wax coating, aluminium oxide coating or others, helps you decide the appropriate refinishing method. For instance, if you have a wood floor with a varnished or shellac finish, paste, liquid wax or oil can give it a desirable lustre.
As for the method, zone in on the damaged area, and thoroughly (but gently) clean it because cleaning and maintenance is always the first step in how to fix wood floor. Remove all dust, hair and grime, and if the trouble spot has dirt that you can clean, do so as well.
Also, you can use a vacuum or a soft mop, but don’t use brooms or abrasive scrub pads. And soaking the floor with liquid cleaners or water is a no-no. Instead, 2 to 4 drops of liquid soap in a quart of water should do; mix them in a spray bottle, and mist your floor.
Then, mop it with a microfiber mop, and lightly spray it with fresh water. Finally, use a soft, dry cloth to buff the floor.
Tip: wax remover solutions can be excellent in cleaning off any wax before reparation.

If you’ve dragged hefty furniture pieces over your floor without protecting it, they may have left gouges over its surface. And its fibres are likely frayed or broken.
But before we get into how to fix gouge in wood floor surfaces, you have to get a wooden filler from your local wood flooring store. And choose one that matches your flooring’s colour so that the repaired area blends with the rest of the floor.
Then, insert the filler in the gouge, and give it sufficient time to dry. Afterwards, gently sand over the filled area to provide it with an even and uniform look.
However, if you have small, surface-level gouges, you can fix them with the easiest DIY hack. All you have to do is use a brown crayon to fill in the gouge and wipe off any extra wax.
As for dents, the method used varies according to the finishing. In other words, finished and prefinished wood have their specific treatments.
Firstly, you can treat slight dents in prefinished wood floors using moisture and heat. Place a damp towel on the damaged spot. Then, put a steamer over it. You’ll start to notice the floor rising slowly. So, carry on dabbing the wood with the hot steamer until you restore it to its former shape. This process shouldn’t take more than 5 minutes.
Tip: If the dents are extremely deep and huge, replacing your damaged floorboards with matching ones may be your only option.
Secondly, you’ll be relieved to see how easy it is to fix dents in finished hardwood floors. Merely add a bit of water to the dent. It might turn blue, which is “blushing”. And it’s nothing to worry about, as the blue colour fades after the finish dries.
Regardless, use a damp folded cloth to dab away extra water over the water-filled dent. Then, use a hot iron to press down the cloth until it becomes dry. Finally, inspect the dent to see how it looks and repeat the previous method until the dent disappears.
To repair the hardwood floor, suck the water out of the trouble spot with a shop vacuum or a squeegee. Be sure to set the vacuum to “wet mode”.
Tip: Wider flooring vacuum attachments make for an easier and more effective process.
Then, mix a mild detergent with a suitable disinfectant, and stir them in a clean and warm water bucket. Next, use a stiff brush to scrub the floor, but don’t pour any water on the floor. Instead, rinse the brush in the water constantly.
If you come across areas with mould growth, scrub them with TSP (trisodium phosphate) to remove the mould. Then, rinse the spot with water, and dry it with a cloth.
For your floor to dry, you can open the windows and doors and put carpet driers or big fans by the doorway to permit more air into the room. Moreover, dehumidifiers and heaters can reduce the moisture for optimal results.
Tip: Don’t open the doors and windows if the humidity outside is higher than the humidity inside.
Afterwards, you might notice some cupping (floorboards bending up or down). If the cupping is minimal, a drum sander or orbital sander can help you sand the flooring. If it’s more severe than that, sanding may not be an option. Instead, you’ll have to nail the floorboards back in place.

When learning how to get scratches out of wood floors, the answer is sanding. Use fine-grained sandpaper to rub that spot of your flooring in the wood grain direction. But note that this process will do away with your stain.
So, choose a hidden spot to test a wood stain, and see if it matches the colour of your floor before applying it elsewhere. Also, patch test different urethane finishes to find the right one, whether that’s water or oil-based.
Tip: If your floor has a polyurethane finish, it might not be difficult to sand it. However, you can dip a scouring pad in mineral spirits and use that or use a sanding screen to make the sanding easier.
Flooring gaps happen for various reasons. First of all, extreme moisture and temperature levels can get your floorboards to contract and expand. So, the heat would make your wood expand, and the cold would make it contract. Accordingly, these fluctuations may create gaps over time.
Second of all, improper acclimatization is another reason. When your flooring hasn’t been equipped for its new environment, this lack of acclimatisation can separate floorboards.
Third of all, gaps can widen due to originally small gaps for contraction and expansion; about 10 to 15mm around your room’s perimeter is the average. Fourth of all, if your wood boards haven’t been installed properly, they can gradually develop gaps.
But what matters most is how to fix gaps in wood floor, and you can do so with a DIY mix. To make your dust and resin mix, add sawdust of your flooring’s colour to clear resin filler, creating a firm paste. And fill the floorboard gaps with this paste using a spatula. This method should fill your small gaps appropriately.
Wood floor discolouration is the result of several conditions. If your floorboards are subjected to extreme weather conditions, such as rain or UV, their pigment can start to fade, lightening their colour. Furthermore, wood rot can change your wood’s colour, especially if it’s brown rot.
And iron staining is also a possible reason for wood discolouration. So, if your wood was sprayed with a grinding metal or a welding splatter, water can make it rusty and create black botches.
As for how to deal with discolouration, you need to set up your floor buffer with a 60-grid screen. Then, run it forward and backwards in the board’s direction; this should remove the shine. And be careful not to dig deep into the wood but just enough to get rid of the discolouration. Then, vacuum the wood thoroughly.
Afterwards, load the floor buffer with an 80-grid screen, and repeat the previous steps. Then, load it with a 120-grit screen, and repeat for the third time. Now, you can use a paintbrush to brush polyurethane on the floor and in the floorboard’s direction. This should create an even coat.
Then, give your floor 8 hours for the shine to set. And to dull it, sand the floorboards with 220-grit sandpaper, and remove the dust. And you can proceed with adding another polyurethane coat, letting it set, sanding it and doing the previous steps. Finally, a third coat is needed, which requires 24 hours to set.
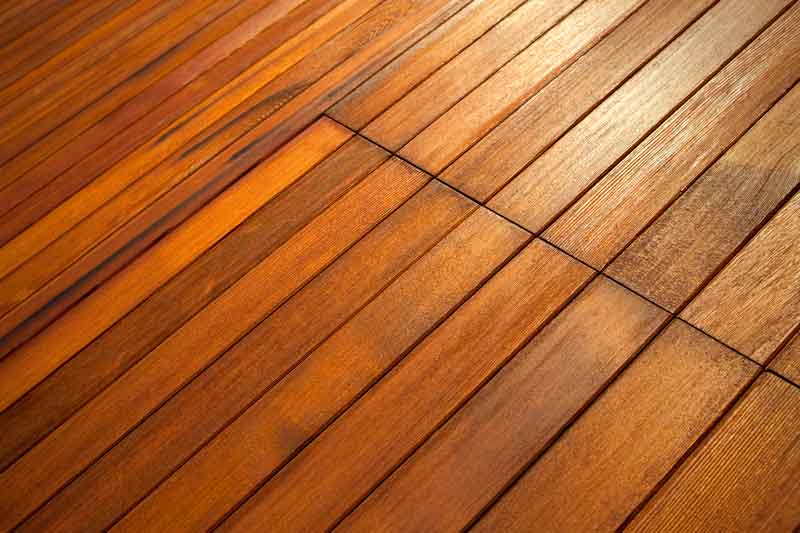
Sometimes, you can’t reverse the damage, and you’re left with no choice other than to replace your wood flooring. To do that, you should:
● Remove any nails with a nail puller or set.
● Make a perpendicular line over the section that needs replacing using a carpenter’s square. If all your wood requires replacing, skip ahead.
● Drill holes by the marks you’ve made with a power drill and 1/2 or 3/8-inch-diameter spade bit.
● Cut the damaged boards in half with a wood chisel.
● Take out the damaged floorboards.
● Use a sharp wood chisel to square up the drilled ends, which makes for a smooth installation.
● Cut out boards to replace the damaged ones, and make sure they match them in size.
● Remove the bottom side of the board’s groove. This should allow you to install a board between two other ones, tongue side in first before putting its groove side in place.
● Try fitting a floorboard, and if it doesn’t fit, cut it again.
● Take out the new strip to apply construction adhesive to its backside. Then, reinstall the board, and tap it in place.
● Insert nails into the boards with 2-inch-long ring-shank flooring nails, and use a nail set to get the heads just under the floor surface.
There are several tools for sanding. To start with, the drum floor sander works for most floors. But it can’t be placed close to the walls, so you can’t use it to sand the room’s perimeter. Instead, an edger would be good for that purpose.
Speaking of edgers, they’re also great sanding tools for shallow areas that drum sanders can’t reach. Also, there are random-orbital sanders, which are vibrating tools that create ultra-smooth sanding. And you can learn more about how to sand wood floors for a more informed project.
One of the solutions for how to remove scratches from wood floor is to apply store-bought chemical abrasion kits. The chemical solution prepares your flooring and eats your old finish away. Then, you can use a new finish coat to revive your flooring. And always consult the abrasive manual for more details.
Another solution is to buff your floors and recoat them with polyurethane. When learning how to restore scratched real wood floor, you’ll come across this method. All you have to do is rough up your wood with a buffer and use screening. Eventually, you can spread the polyurethane finish.
Lastly, you can use a water-based polyurethane revitalizer finish. Get a revitalizer from your local home improvement store. Use it to fill in scratches; give your floor a glossy finish, and let it dry. This is probably the easiest and most budget-friendly solution if you’re looking for an easy DIY to revive your home or impress your tenants.
We’ll go over some things that damage your hardwood floor so that you can look out for them in the future.
Firstly, although rug pads can fix your rug in place so that it doesn’t slide, some types leave marks on your floor. And rubber-backed mats may change your floor’s colour and dull its lustre. So, it’s recommended to use pads that contain rubber and felt.
Secondly, hardwood floors can only take minimal wet cleaning. So, drenching your floor in a cleaning solution isn’t a good idea. Instead, use a damp mop or cloth.
On the other side of the coin, the third reason for hardwood floor damage is neglecting to sweep your floors altogether. This causes the accumulation of dust, dirt and other harmful particles.
Tip: Add a mat by the door to keep the outdoor germs out, and wipe your shoes on it every time you enter. This way, there’ll be less dirt for you to sweep.
Fourthly, high heels have pointy heel caps and don’t distribute body weight evenly, leaving dents. So, taking them off by the door is preferable.
The fifth and final issue is pet scratching. Cats and dogs can scratch your hardwood floor and damage it. But if you trim their nails regularly, you can protect your flooring.
As a parting gift, let us give you some bonus repair hacks that actually work. So, if you’re googling how to remove scratches from real wood flooring, you’re in luck.
The Tibet Almond Stick Almond Scratch Remover is highly effective, thanks to its secret family formula. This colourless remover eradicates surface scratches and is user-friendly. You can merely open the can, take out the stick, unwrap the blue wrappers and rub the wrapper’s end on the scratch. Then, it should fade instantly.
Additionally, we can’t cover how to get rid of scratches on wood floor without one of those DIY timeless, quick, and cheap solutions. You need vinegar and double the amount in water, mix them and dip a sponge in the solution. Then, scrub the floor with it; dry the floor with a towel, and apply a coat of a scratch cover product like the Old English Scratch Cover for Light Wood.
Furthermore, you can use walnuts to remove the scratches on your wood. Create friction between your fingers and the scratched spot to warm it. Crack the walnut, and rub its meat over that area. Don’t stop until the walnut’s oil has soaked into the wood after a few minutes. Then, wipe the area with a soft cloth.
All in all, there isn’t a one-size-fits-all solution for damaged wood. The suitable method depends on the type of floor, type of finish and type of damage your floorboards have endured. Is it scratches, gouges, dents, gaps, water damage, or discolouration?
Moreover, the gravity of this damage also matters. For instance, we can tell you how to restore scratched real wood floor if it has a surface scratch, but more severe ones might require a professional.
Sometimes, if the damage is too severe, replacing your wood floor becomes your only option. But other than that, you can follow our instructions to fix your flooring’s type of damage and restore your wood to its original glory.